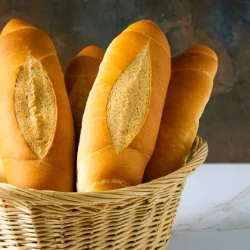
Venezuelan Pan Francés
Making Venezuelan French bread at home is more than just a recipe; it's reliving the tradition of neighborhood bakeries, the smell that accompanied us on the way home, and the joy of sharing with family. With patience and following the steps, you'll have soft bread with a thin crust and all the flavor of our land.
Servings: 6 rolls
Ingredients
- 203 grams water
- 4 grams granulated yeast
- 20 grams sugar
- 8 grams salt
- 20 grams vegetable shortening
- 203 grams all-purpose flour
- 203 grams high-protein bread flour
Instructions
- Weigh all ingredients.
- Starting with water, put all ingredients in the bowl of a stand mixer with a dough hook. Knead for 12 minutes until a smooth, malleable, and homogeneous bread dough forms.
- When the dough is ready, place it in a large bowl and cover with plastic wrap. Let it rest for 10 minutes.
- On a clean work surface and with the help of a rolling pin, extend the dough, fold, and extend again in the opposite direction. Repeat this folding process at least six times, always folding the extended dough onto itself. Cover and let rest for 10 more minutes.
- Do the gluten mesh test. If the dough isn't elastic enough, try folding it again and giving it additional resting time (10 minutes should be sufficient).
- Divide the dough with a bench scraper or dough cutter into 6 portions of 110 grams each.
- Make a ball with each portion of dough. The idea is to achieve a smooth sphere. Keep folding the dough toward the center until you achieve an irregular ball. Pinch the edges so everything is well sealed.
- Make a cup with your palms and start making circular movements with the dough on the work surface. This way, you'll create tension on the dough surface while sealing the base.
- Once the dough is shaped into balls, let the balls rest, covered, on a tray with baking silicone or parchment paper for 10 minutes. You can cover the balls with a clean kitchen towel or put the tray inside a plastic bag.
- With the help of a rolling pin, stretch each ball. You'll notice you have elastic and extremely malleable dough. You'll stretch and form an oval shape, ensuring one end is about a finger's thickness and the other is as thin as possible.
- With a sprayer, spray a little water on the extended dough so that when rolling your bread, the dough sticks. Start rolling the bread, beginning with the thicker part, and stretching and creating some tension in what will be the center of your loaf.
- When finished, press the ends of each roll to form the little tips and place on the same baking tray with the seam down. Each roll should measure about 5-6 inches (about 12-15 centimeters), depending on whether you like your bread long, like in the photos or more chunky.
- Put the rolls to ferment, covered, for an hour and a half (again, you can cover with a towel or put the tray in a plastic bag). Remember that fermentation time can vary depending on environmental conditions.
- During the last half hour of fermentation, preheat the oven and an iron pot that you'll place on the lower rack to 430°F (220°C).
- Just before placing the rolls into the oven, spray them with a little water using a sprayer.
- Make a shallow longitudinal cut on the surface of the rolls.
- Place three ice cubes in the pot, then position the tray with the rolls on the central rack. Bake for 10 minutes.
- Lower the temperature to 390°F (200°C) and bake for 20 more minutes until golden brown.
- To make sure your rolls are perfectly cooked, insert a thermometer through one of the tips toward the heart of the roll. If the thermometer reads 200°F (93°C), the bread is ready.
- Let cool on a metal rack for 10 minutes before serving.
